How I use Dynamic Pixel Mapping
When I was first conceptualizing the project, I had a big problem to tackle. What I wanted was a dynamic street with many different looking people, doing the same actions and animations, at a large scale. Now, in 3D, this wouldn’t be an issue. Just create a set of skeletal animations and map different models to them. But with 2D art, especially pixel art, we don’t have this advantage.
Every pixel has to be drawn in manually. If you wanted to create a new person for your scene, you would have to manually redraw every frame of every animation for every character. And as soon as you make any small change to a frame, or add a new animation, you would have to update every character you had made up to that point. Luckily, there is a better way: Dynamic Pixel Mapping.
This concept was first introduced to me by aarthificial in this video: https://www.youtube.com/watch?v=HsOKwUwL1bE. He really laid the groundwork for this whole project so big shout outs to him!
Basically the system works by drawing with pixel coordinates instead of colors and using a second texture to map those colors onto the finished animation. If you have any experience with 3D software, the process is very akin to UV mapping. More detail on the basics of the process can be found in the video, but I can go a bit more into detail on how I used the system personally.

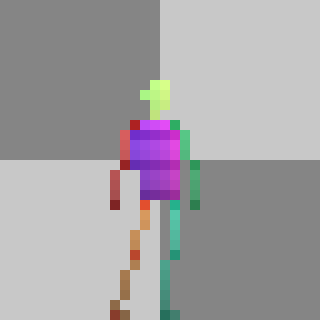
My process started with a basic sprite, this is the design I used to first map out the art style so that’s what stuck.

I then drew a map texture, separating the body parts and “unfolding” them from 3D space. It’s important that every surface and every pixel is accounted for. We may not be able to see the character’s back from this angle, but we should map it out in case another animation does.

Once that was done, I drew over that map with a UV texture. I assigned each region a gradient. The head, for example, is a gradient from lime green to yellow. Every step in the X direction is a lighter hue, and every step in the Y direction is a darker value. This means every pixel is a different color, which is very important. While doing this, I also marked out specific areas with special colors, marking the knees and elbows, and lining the torso to make the next process easier.
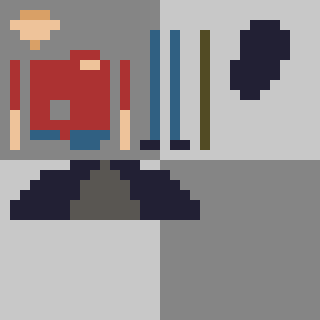
Then I drew over the original sprite with the UV texture colors. This part was the most arduous. It required the most critical thinking and rigorous color sampling. I later made a custom palette of just these colors mapped out to make things easier.
Then I followed this tutorial to https://www.youtube.com/watch?v=nYch_TIkq6w&t=215s implement the necessary shaders in-engine.
With that all set, production could really begin.
Animation Workflow
My workflow looked something like this, I start by animating my default character in, say, a walking cycle.
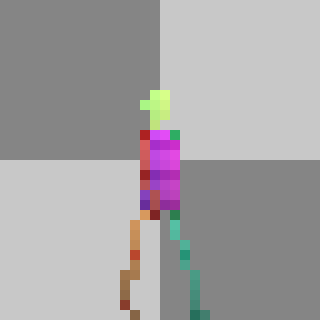
Once I was happy with how it looked, I went through each frame, tracing over the initial animation with the UV colors. I often started with easily recognizable sections like the face, knees, shoulders, and elbows; and worked to fill the gaps between them. Once I had one frame, I could often reuse parts that didn’t change much, like the face, for other frames, cutting down on production time.
I also drew each body part on different layers for reasons I’ll describe in their own post, but once I had a finished animation, I exported the sprite sheet to Unity for animation.
Character Workflow
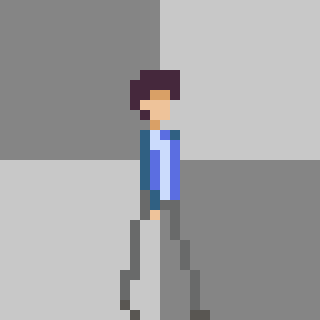
For new characters, all I had to do was edit the original skin texture to how I wanted and the animations would transition over cleanly. No sweat!
That’s pretty much how animating from a production side went. But what about implementing them in Unity? Why put them on separate layers? What about stuff like the hair and umbrellas? All of that and more are explained in their own upcoming blog posts.
But suffice to say, Dynamic Pixel Mapping was really the star of this project. So much of this project couldn’t have been done without it, to the point where it slowly shifted to become an advertisement for what it can do. It is truly revolutionary for pixel art in games and I’m excited to see what comes next!